Car decals or stickers are an excellent way to revamp the appearance of your vehicle. You can apply decals to different locations on the car to add personal touches like showing support for your favorite sports team or as powerful marketing tools to advertise your business. Proper application and removal techniques will preserve the integrity of your custom decals and keep your car looking well maintained.
Which Material is Right for Your Car
There are many materials available which can be customized according to your specific needs. However, there are three types of material most commonly used for decals.
- Static Cling Vinyl Decals
Static cling vinyl decals contain a static charge which causes adhesion and lets you stick them onto smooth, non-porous surfaces like glass or plastic. Since a typical decal of this type uses static charge instead of an adhesive material, it can be repositioned or removed, leaving no residue on the surface. This type of material however, is used for decals you plan to put on the inside of your car rather than the outside.
- Polypropylene Decals
These decals offer higher durability than other materials since they are waterproof and tearproof. You can order either transparent polypropylene decals or white ones. Polypropylene also shows resistance to discoloration and fading.
- Polyester Decals
Polyester is more robust than vinyl since it is tear-resistant and can endure exposure to oils, solvents, and other chemicals. Polyester decals are ideal for vehicles that often deal with harsh outdoor conditions.
Designing Your Decal

When designing your decal, keep it simple – especially if you plan to use decals to advertise. You can choose from a wide variety of pre-designed templates or upload your own graphics. If you choose the template route, you can customize the layout according to your preferences without the hassle of designing from scratch with complex illustration software.
The Perfect Placement
For a vehicle, you only have a few optimal locations to install your decal including windows, bumpers, and side doors.
- Windows
Window decals are ideal when showcasing ideas on your car windows. You can apply decals to both the outside and inside of your car windows. Clear vinyl is one of the best materials used for window decals since it is waterproof and durable. It is adhesive from both front and back, which makes the installation process a breeze.
- Bumpers
Car decals can be applied anywhere on the outside of your vehicle as long as they do not obstruct your view. One of the best locations to apply decals is the car’s bumper since people notice messages placed on this area.
- Side Doors
Yet another popular location to apply car decals is on the side door. You can customize a design template and have it resized according to your car doors. Car flags can be added to car door windows to direct onlookers’ attention to the decal message. This placement is popular for sharing team spirit or advertising delivery services.
Applying Your Decal
Whichevery decal material and placement you choose, there are a few simple steps you must follow to avoid leaving wrinkles or bubbles:
- Step 1: Clean the Surface
Clean the car’s surface thoroughly before applying decals or dirt will stick to the adhesive backing and impede the decal’s ability to stick to the car’s surface.
- Step 2: Determine Placement Area
Always pick a well-viewed area on your vehicle to ensure that most onlookers take notice. You must also perform some measurements to determine the center point when applying your decal.
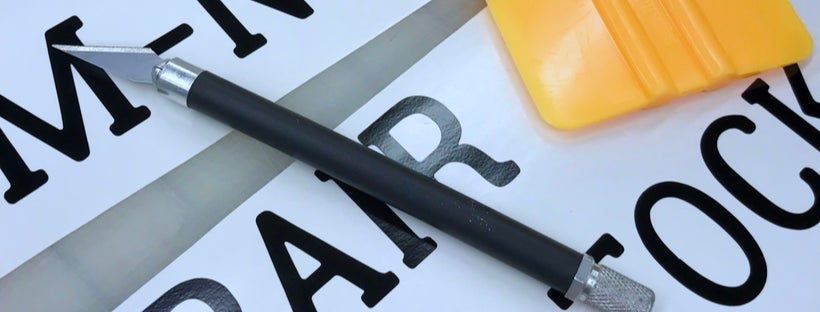
- Step 3: Peel
If your decal is shorter than your forearm’s length, you can peel off the entire backing of the decal to reach the adhesive. If the decal is larger, it is wise to peel only a few inches off at a time to keep the decal from gathering dirt.
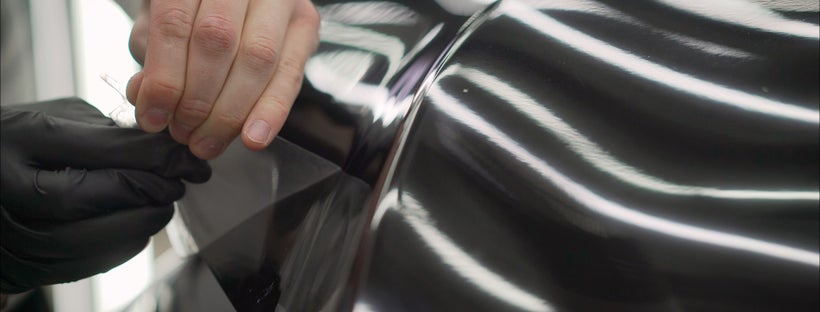
- Step 4: Application
Use tape markings to guide the application process. Place one edge of the vinyl decal on the car and begin smoothing it out with a straight edge, like a credit card or squeegee. Starting from the center of the decal, run the straight edge up to smooth out wrinkles or bubbles. Perform this task in a clockwise circle until you have worked the entire surface.
Maintaining Your Decal
Since vehicles encounter rough conditions on the road, you must know how to maintain vehicle decals to prevent wear and tear.
- Ensure that you properly clean the surface before applying the decal using a clean cloth and alcohol.
- Use a soft cloth and a solution of detergent and water to remove dirt and grime.
- Let the decal dry and wipe it with rubbing alcohol.
- Use glass-friendly chemicals or basic soap solutions to clean window decals.
- Dry off your washed decal using a soft dish towel.
Removing Old Decals
Due to their cost-effective nature, you can remove old decals and install new ones as many times as you wish.
- Method 1: Heat
The application of heat destroys vinyl. Use a hair dryer or heat gun to apply heat to the decal so you can remove it conveniently. Upon moving the heat gun slowly over the edges, you will observe lift or bubbling. Upon finding a loose edge, slide the scraper under the vinyl and scrape it off.
- Method 2: Peel
If the vinyl has only gotten installed recently or if you can find loose ends, grabbing and gentle peeling is all that is required. You can use an adhesive remover after that to wipe off the remnants of the decal.
- Method 3: Water
If you wish to remove your decal intact, use a damp, warm rag and rub it gently over the decal. Avoid rubbing the rag in the same spot for too long as it can melt the decal. Please wait until you see a lift in the vinyl, and then use the scraper to gently scrape it off the car.
Car decals are one the most common methods of on-the-go advertisement or car decoration. They are on the side of trucks, business, vans, and even large 18-wheelers. They serve the purpose of personalizing your brand on your business vehicles. Follow these tips next time you need to apply or remove a decal for a flawless finish every time.
 Posted in