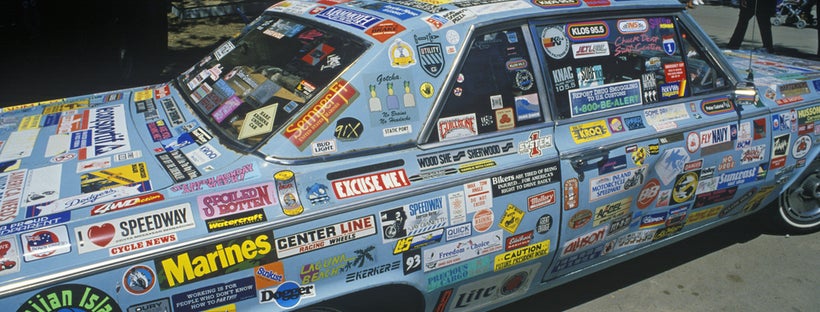
Removing old car decals can be tricky, especially when you want to avoid damaging your vehicle’s paint. While heat is often recommended, it carries risks such as damaging the paint or leaving behind sticky adhesive. In this guide, we’ll show you how to remove car decals without heat and discuss effective decal removal tips that ensure your car stays scratch-free and smooth. With a variety of techniques available, this guide will help you achieve a clean removal using safer, heatless methods.
Why You Should Avoid Using Heat for Decal Removal
Heat can soften the adhesive behind decals, making them easier to peel off. However, applying too much heat risks weakening your car’s paint, leading to peeling, bubbling, or even discoloration. For older decals, excessive heat may not work as well since the adhesive hardens over time. The methods we discuss here will show you how to remove old car stickers and prevent these potential issues from happening; while also ensuring you remove car decals without damaging paint.
Prepare Your Vehicle for Decal Removal
Before attempting any removal method, it’s important to clean the area around the decal. Dust, grime, and other debris can accumulate around stickers, making it harder to remove them and increasing the risk of scratching the surface. Cleaning the area also makes the decal more pliable for removal, especially if it’s been on your car for a long time.
Steps for Cleaning:
- Fill a bucket with warm water and mix in a mild liquid soap.
- Use a soft cloth or sponge to wash the area around the decal, ensuring you scrub away dirt, dust, and grime.
- Rinse the area with clean water to remove soap residue.
- Let the area air-dry completely before starting the decal removal process.
A clean surface is easier to work with and helps ensure you don’t drag dirt or debris across the paint as you peel off the decal.
Clean the Surface
Vehicles are constantly exposed to dirt, roadside debris, sunlight and moisture. Over time, a layer of grime builds up on the surface of a vehicle, which can gather around the edges of your car decal. Cleaning the area prior to removing the decla will make the process run smoothly.
Drop a small amount of liquid soap into a bucket full of lukewarm water and allow the soap to dissolve into the mixture. Using a clean rag, thoroughly wipe around the decal to remove the dust particles and grime from the surface. Pour clean, soap-free water on the area to wash away the suds. Now, allow the surface to air dry completely.
Method 1: Use Warm Water and Soap

One of the most gentle methods to remove car decals without heat is with warm soapy water. This technique works particularly well for decals that aren’t heavily adhered to the car or for removing decals from car windows, such as car window decals.
Steps for Using Warm Water:
- Soak a clean cloth in warm, soapy water and place it over the decal. Ensure the cloth covers the entire sticker.
- Let it sit for several minutes to allow the water to loosen the adhesive.
- Peel up one corner of the decal using your fingernail or a plastic scraper. Be patient and peel slowly to avoid tearing the decal or leaving adhesive behind.
- Reapply the warm cloth as needed if the sticker becomes stubborn to remove.
This method is great for gently loosening the decal without causing damage to the paint or window surface, making it one of the safest ways to remove car decals without damaging paint.
Method 2: Use an Adhesive Remover Spray
If soap and water don’t do the trick, an adhesive remover spray is a highly effective alternative. Designed specifically for breaking down sticky adhesives, this product can make peeling old decals off much easier.
Steps for Adhesive Remover:
- Spray the adhesive remover directly on the decal, ensuring it’s thoroughly soaked.
- Let the remover sit for 5-10 minutes, allowing it to break down the glue.
- Use a plastic scraper to gently peel away the decal from one corner, slowly lifting it off in one piece.
- Once removed, use a clean cloth to wipe away any residue left behind.
Many adhesive removers are designed for use on cars, so they’re safe on both painted and glass surfaces. They’re particularly helpful for removing decals from car windows or even bumper stickers, where residue might be harder to spot.
Method 3: Use Acetone or Rubbing Alcohol
For tougher decals that refuse to budge, acetone or rubbing alcohol is an excellent solution. These solvents help dissolve adhesive quickly without damaging the vehicle’s paint if used properly.
Steps for Using Acetone:
- Dampen a cloth or cotton ball with acetone or rubbing alcohol and apply it to the decal.
- Let it sit for 5-10 minutes to loosen the adhesive.
- Gently peel up a corner of the decal and slowly work your way across the entire sticker.
- Wipe the area with a damp cloth to remove any acetone or adhesive residue.
Caution: Acetone should only be used in small amounts and on glass or metal surfaces as prolonged exposure can damage car paint. If you’re concerned about using acetone on painted areas, test it on a small, inconspicuous spot first. This method works particularly well for car stickers opaque and other more stubborn decals.
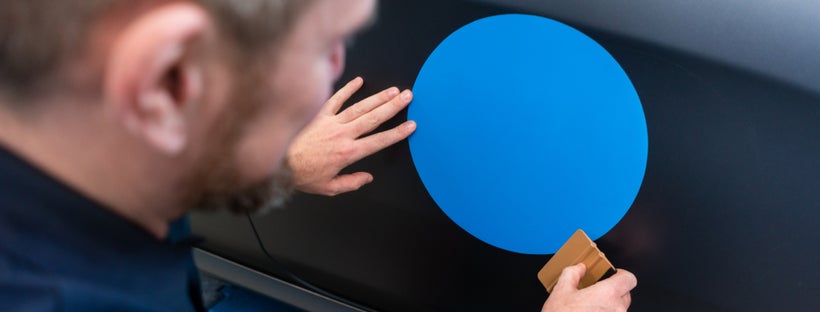
Method 4: Use a Plastic Razor Blade or Scraper
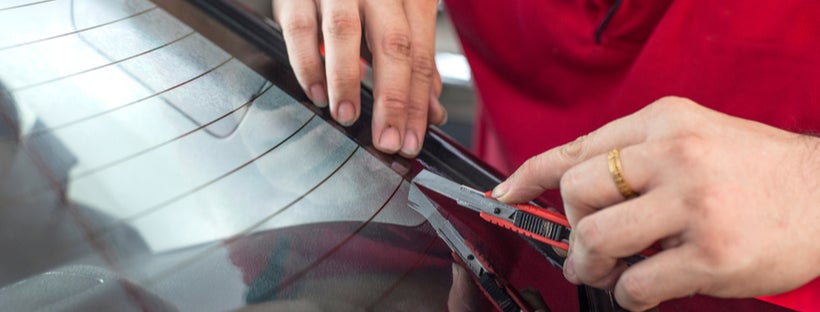
Using a razor blade might sound risky, but with the right tool and technique, it’s an effective way to remove vinyl stickers from cars, especially on glass. For painted surfaces, opt for a plastic razor blade or a specialized scraper to avoid scratching.
Steps for Razor Blade Method:
- Hold the blade or scraper at a 30-45 degree angle and gently slide it under the edge of the decal.
- Slowly work the blade under the sticker, applying light pressure as you move inward.
- If the decal resists, apply a bit of adhesive remover or warm water to loosen it further.
Using a plastic razor blade helps protect your car’s paint while still effectively removing the decal. If you’re working on car window decals, this method is perfect as it ensures clean removal from the glass without any residue.
Method 5: WD-40 for Stubborn Decals
WD-40 is a household name when it comes to loosening up sticky substances, and it’s great for decal removal as well. It’s gentle enough to use on car paint and powerful enough to dissolve even stubborn adhesives.
Steps for Using WD-40:
- Spray WD-40 directly onto the decal, especially focusing on the edges.
- Let it sit for a few minutes to penetrate the adhesive.
- Use a plastic scraper or your fingernail to gently lift the decal, slowly peeling it away.
- Once removed, wipe the area with a clean cloth to get rid of any remaining residue.
WD-40 is especially useful if you’re working with larger vehicle magnetic signs or decals that have been in place for a long time.
Finishing Touch: Clean and Polish the Surface
Once the decal is removed, the job isn’t quite done. There’s often adhesive residue or smudges left behind, so you’ll want to clean the area thoroughly to restore your car’s appearance. Follow these steps:
- Clean the area with soapy water to remove any leftover adhesive.
- Wipe the surface dry with a clean, soft cloth.
- Apply a coat of car wax or polish to the area to protect the paint and restore the shine.
This final step ensures your car’s surface remains in top shape, especially after removing old decals.
The Best Ways to Remove Decals Without Heat
Removing old stickers and decals doesn’t have to be a difficult process. By following the methods we’ve outlined, you can safely and effectively remove car decals without heat, protecting your car’s paint and glass in the process. Whether you’re using warm water, adhesive remover, or acetone, the key is to take your time and avoid rushing through the process.
For larger vehicle magnetic signs or bumper stickers, consider using the adhesive remover method combined with a plastic scraper for optimal results. These techniques are designed to keep your car looking clean and scratch-free, ensuring that your vehicle is ready for its next customization!
By using these effective methods, you’ll be able to confidently remove decals without any damage, preserving the quality and look of your vehicle for years to come.
Written by Best of Signs Editorial Team!